Satan R1 shock adapter Ver. 4

jumb5150

Member
I picked one up a couple weeks ago. It's sitting here next to an R1 shock. haven't installed it yet mainly because I need to get off my ass and finally ordered the powder coat. I wanna know if anyone has installed the version 4 yet and if there is any cutting involved or other such modifications.
 

ramrod

New member
Same thing here, I ordered a spring compressor last week so I can remove the spring to paint it. Keeping my eye posted on the board for the same reason.
 

jumb5150

Member
Im trying to figure out if its just plug and play or do I have to cut out some of the votlage regulator tray.
 

Satan666

Member
Mods Required

Im trying to figure out if its just plug and play or do I have to cut out some of the votlage regulator tray.

Just received some pictures from Wolf_Hook showing placement of the adapter with the V/R in place.

The top of the shock does make contact with the tray.

Will be working on a mod for the installation instructions.
 

Satan666

Member
GNBN

How much of the tray will i need to cut?

I have reviewed the photos sent by Wolf_Hook showing the modifications needed to the tray. I had a hard time visualizing the mod until I realized that his was a California bike with all the 'extras' for fuel recirculation. The tray is significantly more complicated (and 19x more expensive) than the non-CA model.

It appears that the required modification to the standard US model is similar to that done by Dr_Doom for the Version 3 adapter. Cutting a small portion from the front of the tray to clear the shock reservoir, drilling a new hole and remounting the V/R at a slightly different angle.

The CA model includes a similar cut to the front of the tray to clear the reservoir. Because of the welded design of the tray, the front left mounting point of the upper stamping is removed and the metal bent back slightly to provide clearance. Wool_Hook re-welded the bent portion to the lower tray.

Additionally the holes mounting the fuel canister must be elongated to allow mounting the canister about 3/8" rearward to clear the shock casting. When the canister is moved, an additional cut or grind must be made to the tray to allow clearance for the fuel hose.

Finally, the CA lower plastic splash cover must be cut for reservoir clearance.

Sorry, that's one of the small trials otherwise necessary for CA living.

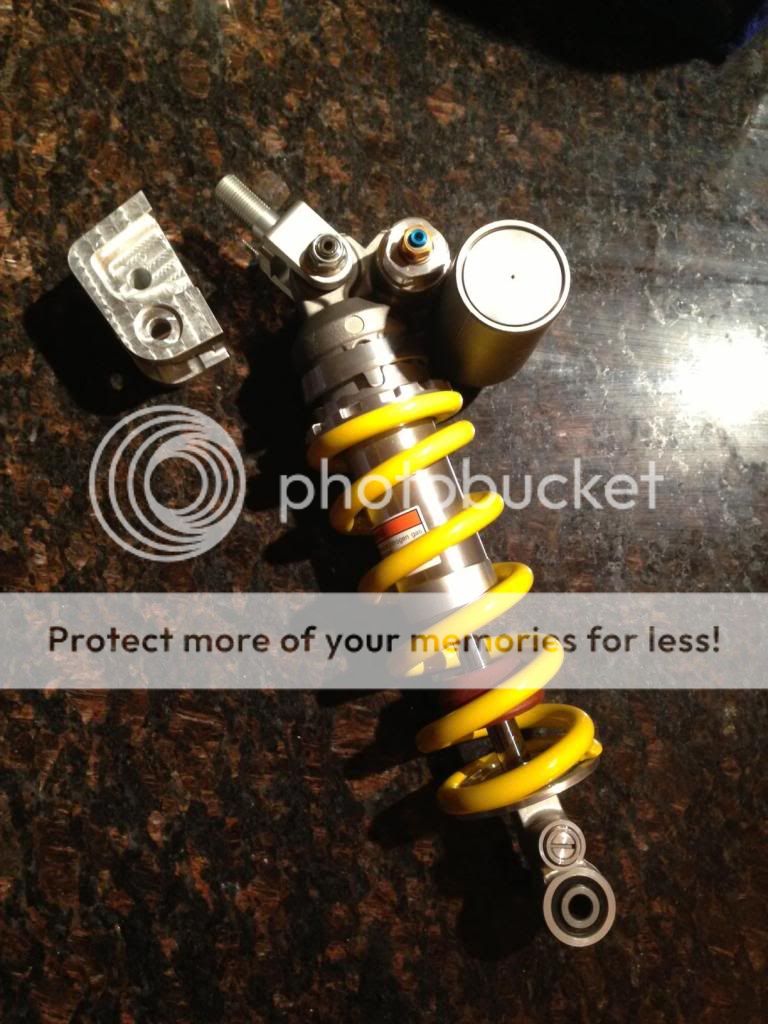
The following photos illustrate the described mods for California models. Thankfully, the standard model is much less complicated and I would welcome any photos of that tray mod.

Thanks to Wolf_Hook for the engineering and great photography. I now understand why my prototype tester (also in CA) never got back to me about tray mods.
 

jumb5150

Member
Ok I think I got it with these photos and description. Thanks satan. But does anyone have a guide or a picture tutorial to remove the shock. All I really have to work with is a rear stand. What else would I need?
 

ramrod

New member
Thanks Wolf and Satan for the update and pictures. I'll try to do mine this weekend but can't make any promises.

Jumb: i think they have a tutorial in the how to section. I'm keeping my eye posted in case you get to it before me.
 

jumb5150

Member
I just powder coated the spring today at work. Almost ready to do the install.
::crossing fingers::


ramrod

New member
Whew, all done!

Install took ~2.5 Hours start to finish. It was actually a straight forward install. The longest parts being setting up the come along/rigging, fitting the V/R tray, and getting the bottom bolt lined up w/ the lower suspension linkage (pain in the ass!).

First off thanks to Satan666 for a quality adapter w/ zero fitment issues and Dr_Doom for his installation instructions found here. The pics that Doom has of the V/R Tray saved a lot of time. I added an extra 'V' notch on the right side of the tray in order to help clear the Nitrogen chamber.


Jumb: Between Dr_Doom and Satan's instructions, installation should be a breeze.

As for the R1 Shock, all I can say is :eek:. Right after I dropped it down from the rafters and compressed it to settle out know the rear tire is planted to the ground. I have dampening set 8 clicks out and the spring is set in the middle. I'll be messing with settings during the weeks to come. Even though I only took it for a quick spin here on base, I can say without a doubt this Mod is in my Top 3.

Now enough w/ the delay, here are the pics and please excuse her filthiness:


D

Deleted member 438

Guest
Looks awesome. You should take the exhaust bracket off of the passenger peg to clean it up.
 

ramrod

New member
Thanks Doom. Actually I had to reattach the passenger pegs so I could thread the sling around the tail.
 

jumb5150

Member
Looks great!! I have a question about the rigging. All I have to work with is a rear spool stand and maybe borrow a front stand. I also have a floor jack. Are these sufficient? and Im guessing that I would need to remove the battery to get to the VR tray.
 
D

Deleted member 438

Guest
I used ratchet straps to hang the rear from the rafters in the garage.
 
Top